
- Sponsored -
How To Compress Videos On iPhone: Step-by-step Guide
Do you want to compress a video from iPhone? Here's a complete guide on how you can compress a video file from an iPhone. Know about a few video compressing apps and why videos need to be compressed
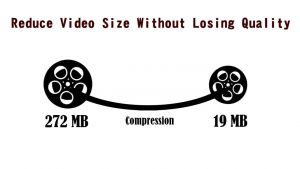
If you are new to content creation and video making business, then you would ask questions such as why do people even compress the videos? When someone compresses the video using any apps it is basically to lose the quality of the video. Videos files occupy a lot of space in the devices (mobile, laptops or PC). To avoid using a lot of space from any of the device, people prefer compressing the videos to lower quality before saving them. Video compressors typically reduce the size of the video file to make it easy to store in any device with a low storage capacity. Here’s everything you need to know about how to compress a video from iPhone. Also, know about the alternate methods of compressing video files.
- Sponsored -
Benefits of compressing videos before story in the device:
- Compressor reduces the size of overall video
- Compressor doesn’t cuts the video length/timeline. It reduces the extra storage demand
- Video compressor lowers the transmission bandwidth needs
- Storage of video becomes easy and hassle free with compressors
- One can share the compressed video easily to other devices
Step-by-step guide to compress video on iPhone:
- You need to have Video Compress App downloaded on your iPhone device
- Once the installation is completed, click on the giant + sign on the homepage
- The installed App would ask for relevant permissions such as accessing the photos app
- Click on the OK button
- The Video Compress will then showcase the list of videos videos available in your Camera Roll
- Now click on the video you want to compress (one can select multiple videos to compress at once)
- The App then showcases several options to compress the video. It include full-HD quality which compresses to 28.6MB per minute. The lowest quality is at 360p, it compresses video 3.6MB per minute
- Select the preferred option and then the compressor will ask you to select the destination to save the album
- Select Add New Album from the bottom
- Once the option is selected, video compression process begins. It takes around 30 seconds for any type of video to be compressed
- In the last stage of compressing, the App asks if you want to keep the original copy or delete it
- Select any preferred option and complete the compression process

Best video compressors for iPhone and iOS:
1. Video Compressor
It is a free to use app for iPhone users. It helps in video resizing, compressing and converting. One can easily convert any video file for all portable media players. It has an advanced video compressor, which offers basic video editing functions, such as add watermarks, cut video, deinterlace video, modify levels, add paddings, crop video frames.
2. Video Slimmer App
This one is available for free. Also, the paid version has pro features for $2,99. This video compressing app allows users to shrink the video files that are filmed on iOS devices. The video is compressed to small file size, while the video quality doesn’t get affected. The video files you shot with iPhone, iPad or iPad Pro are very huge in size and often they need to be compressed to reduce the storage space. A 5 minutes video can take up to 0.5G space in the device.
3. Video Compress – Shrink Vids
This one is a free to use application, but there also interesting features in paid version. One can reduce the size of videos recorded in 4K, Full HD or HD resolution within a matter of seconds. Only few steps are needed to be followed on the app to compress the video in this app. It enables users to choose several options from list of resolution preference. However, the users need to get subscribed to paid versions in order to remove the ads or unlock interesting features.
How to reduce video size on iPhone & iPad when recording?
- Select Record Video from the Camera menu
- Then choose the new resolution for your video before starting to shoot
- The default resolution is always set to 1080p at 30fps. But one can change the setting by reducing it to 720p at 30fps. This can resize the video without affecting the length and its quality on greater level
- While using the Slo-Mo recording option, you can choose between 720p HD at 120fps or 720p HD at 240 fps. This lets user preserve storage space while recording high-quality slow-motion videos on the iPhone or iOS device.
For more such updates, stay hooked on to The Live Mirror.
Also Read: How To Know If Someone Blocked Your Handle On Instagram
- Sponsored -